DIY Wood Block Photo Stand

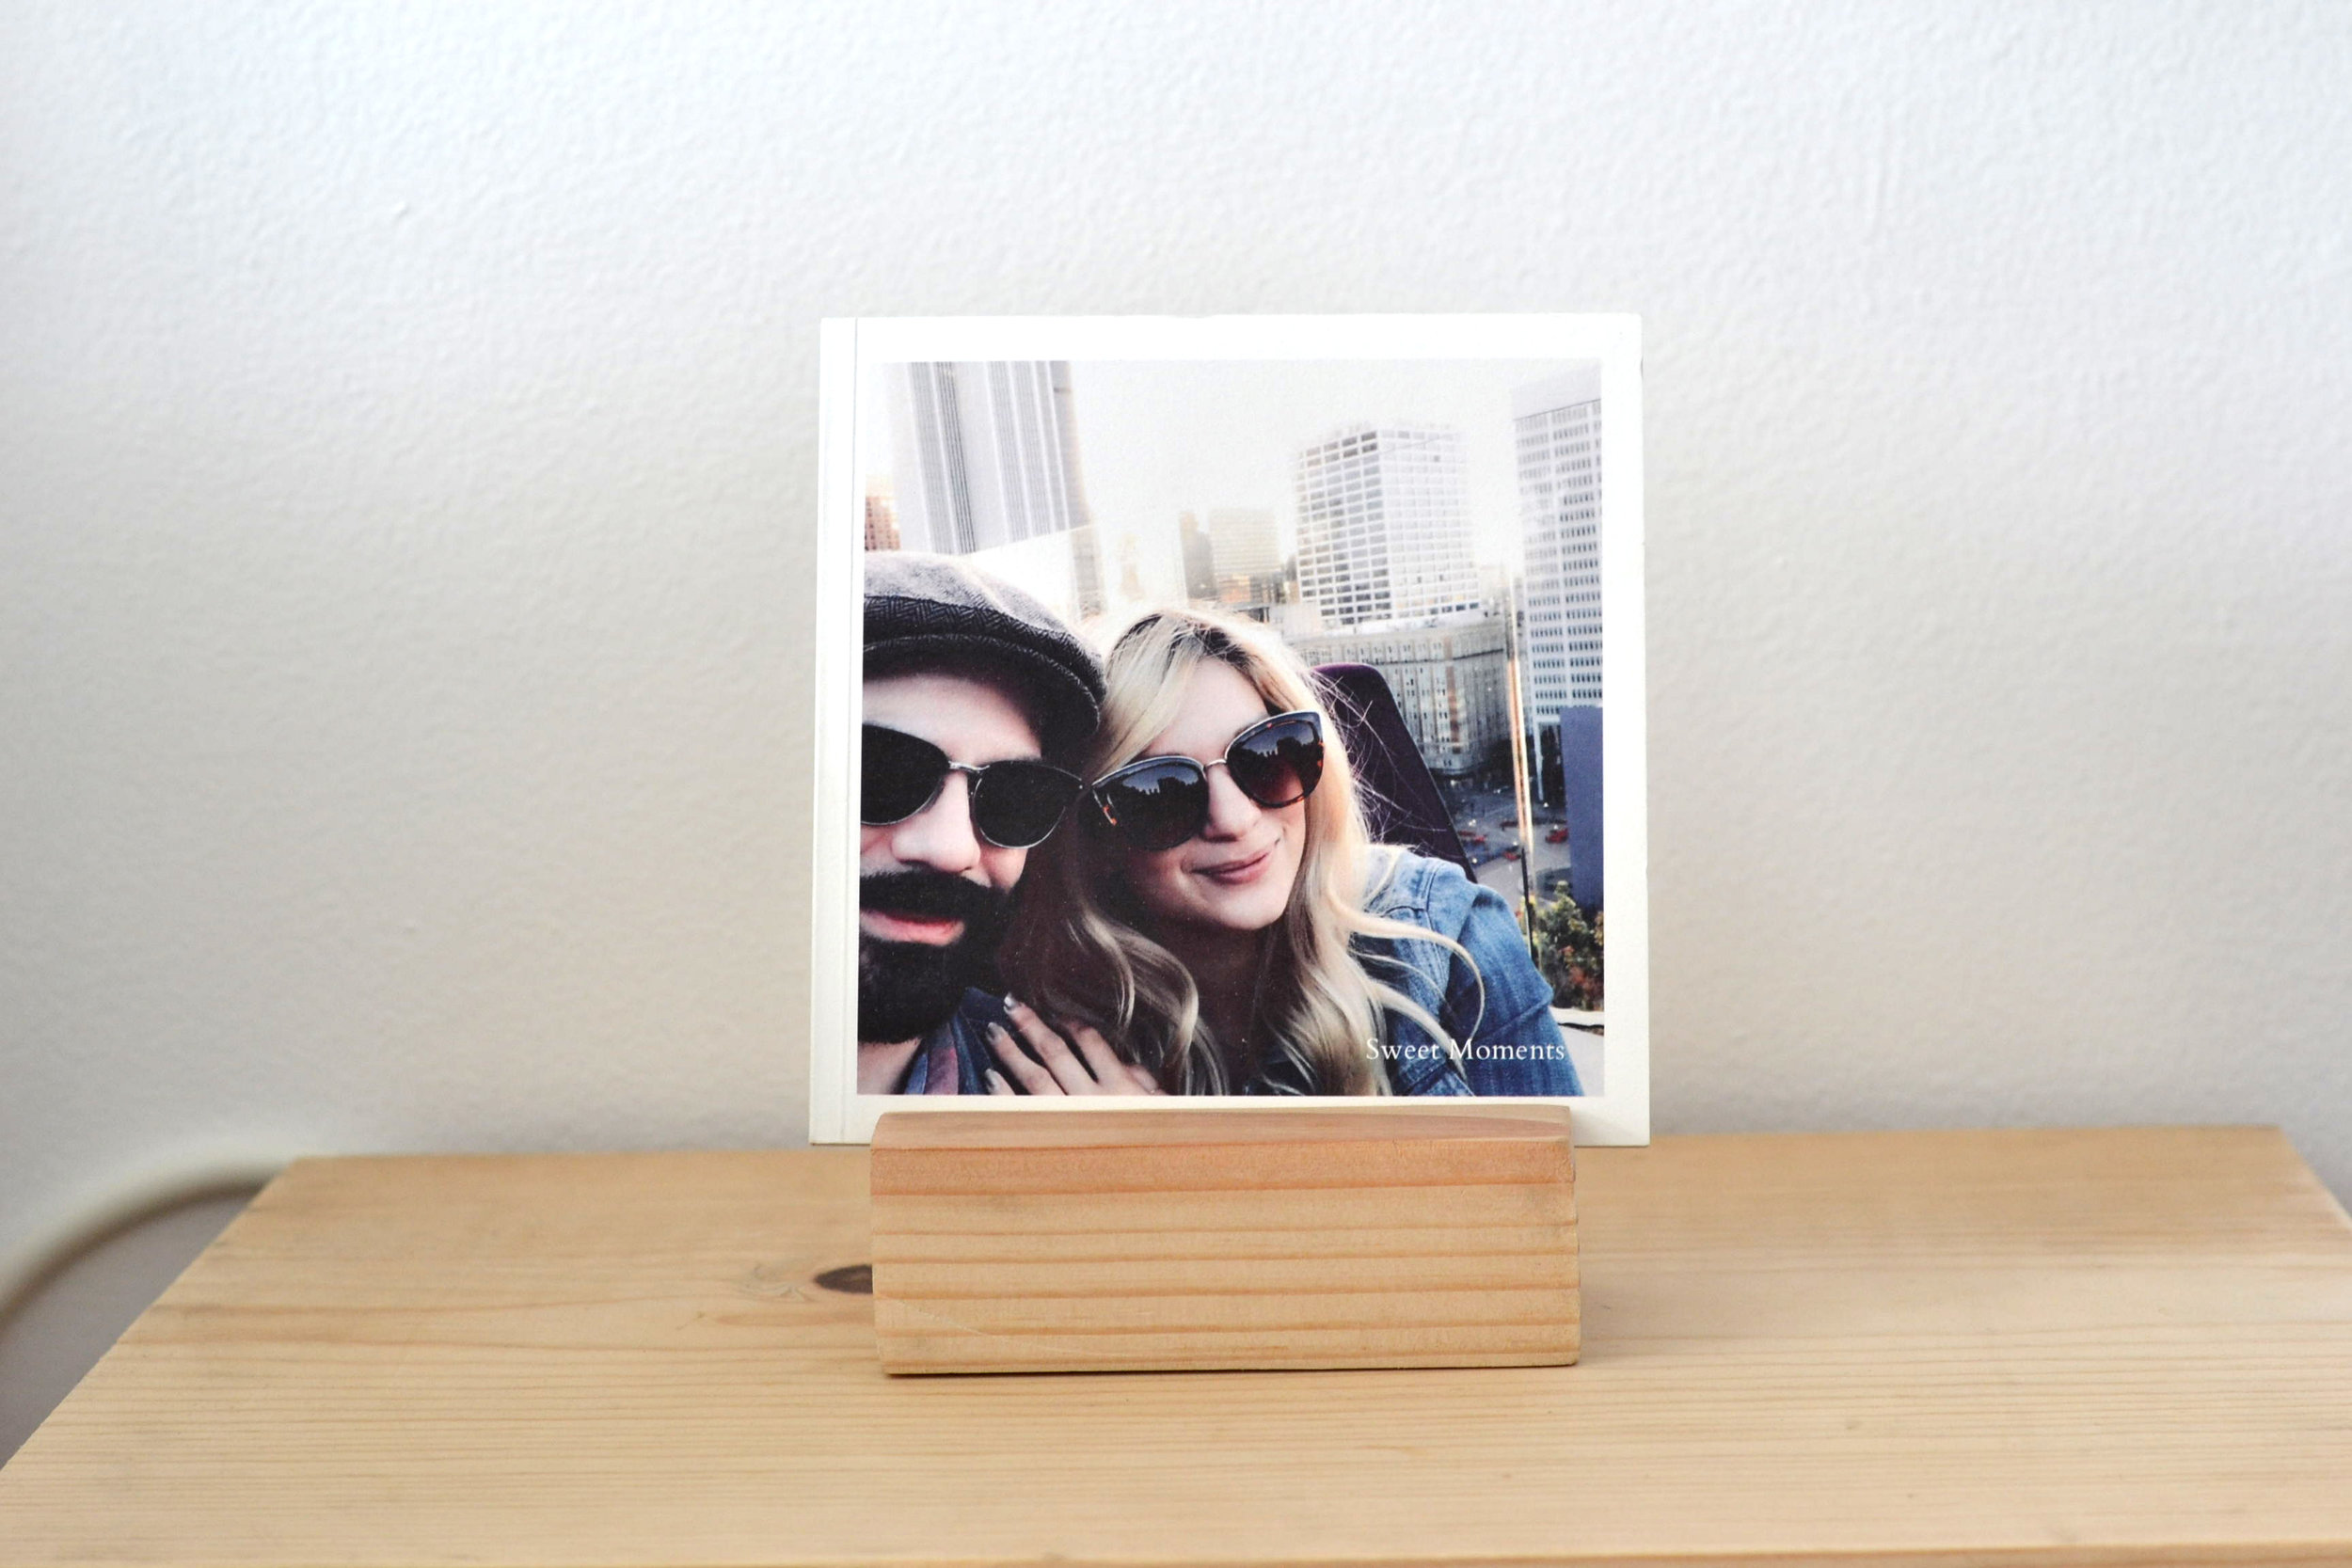
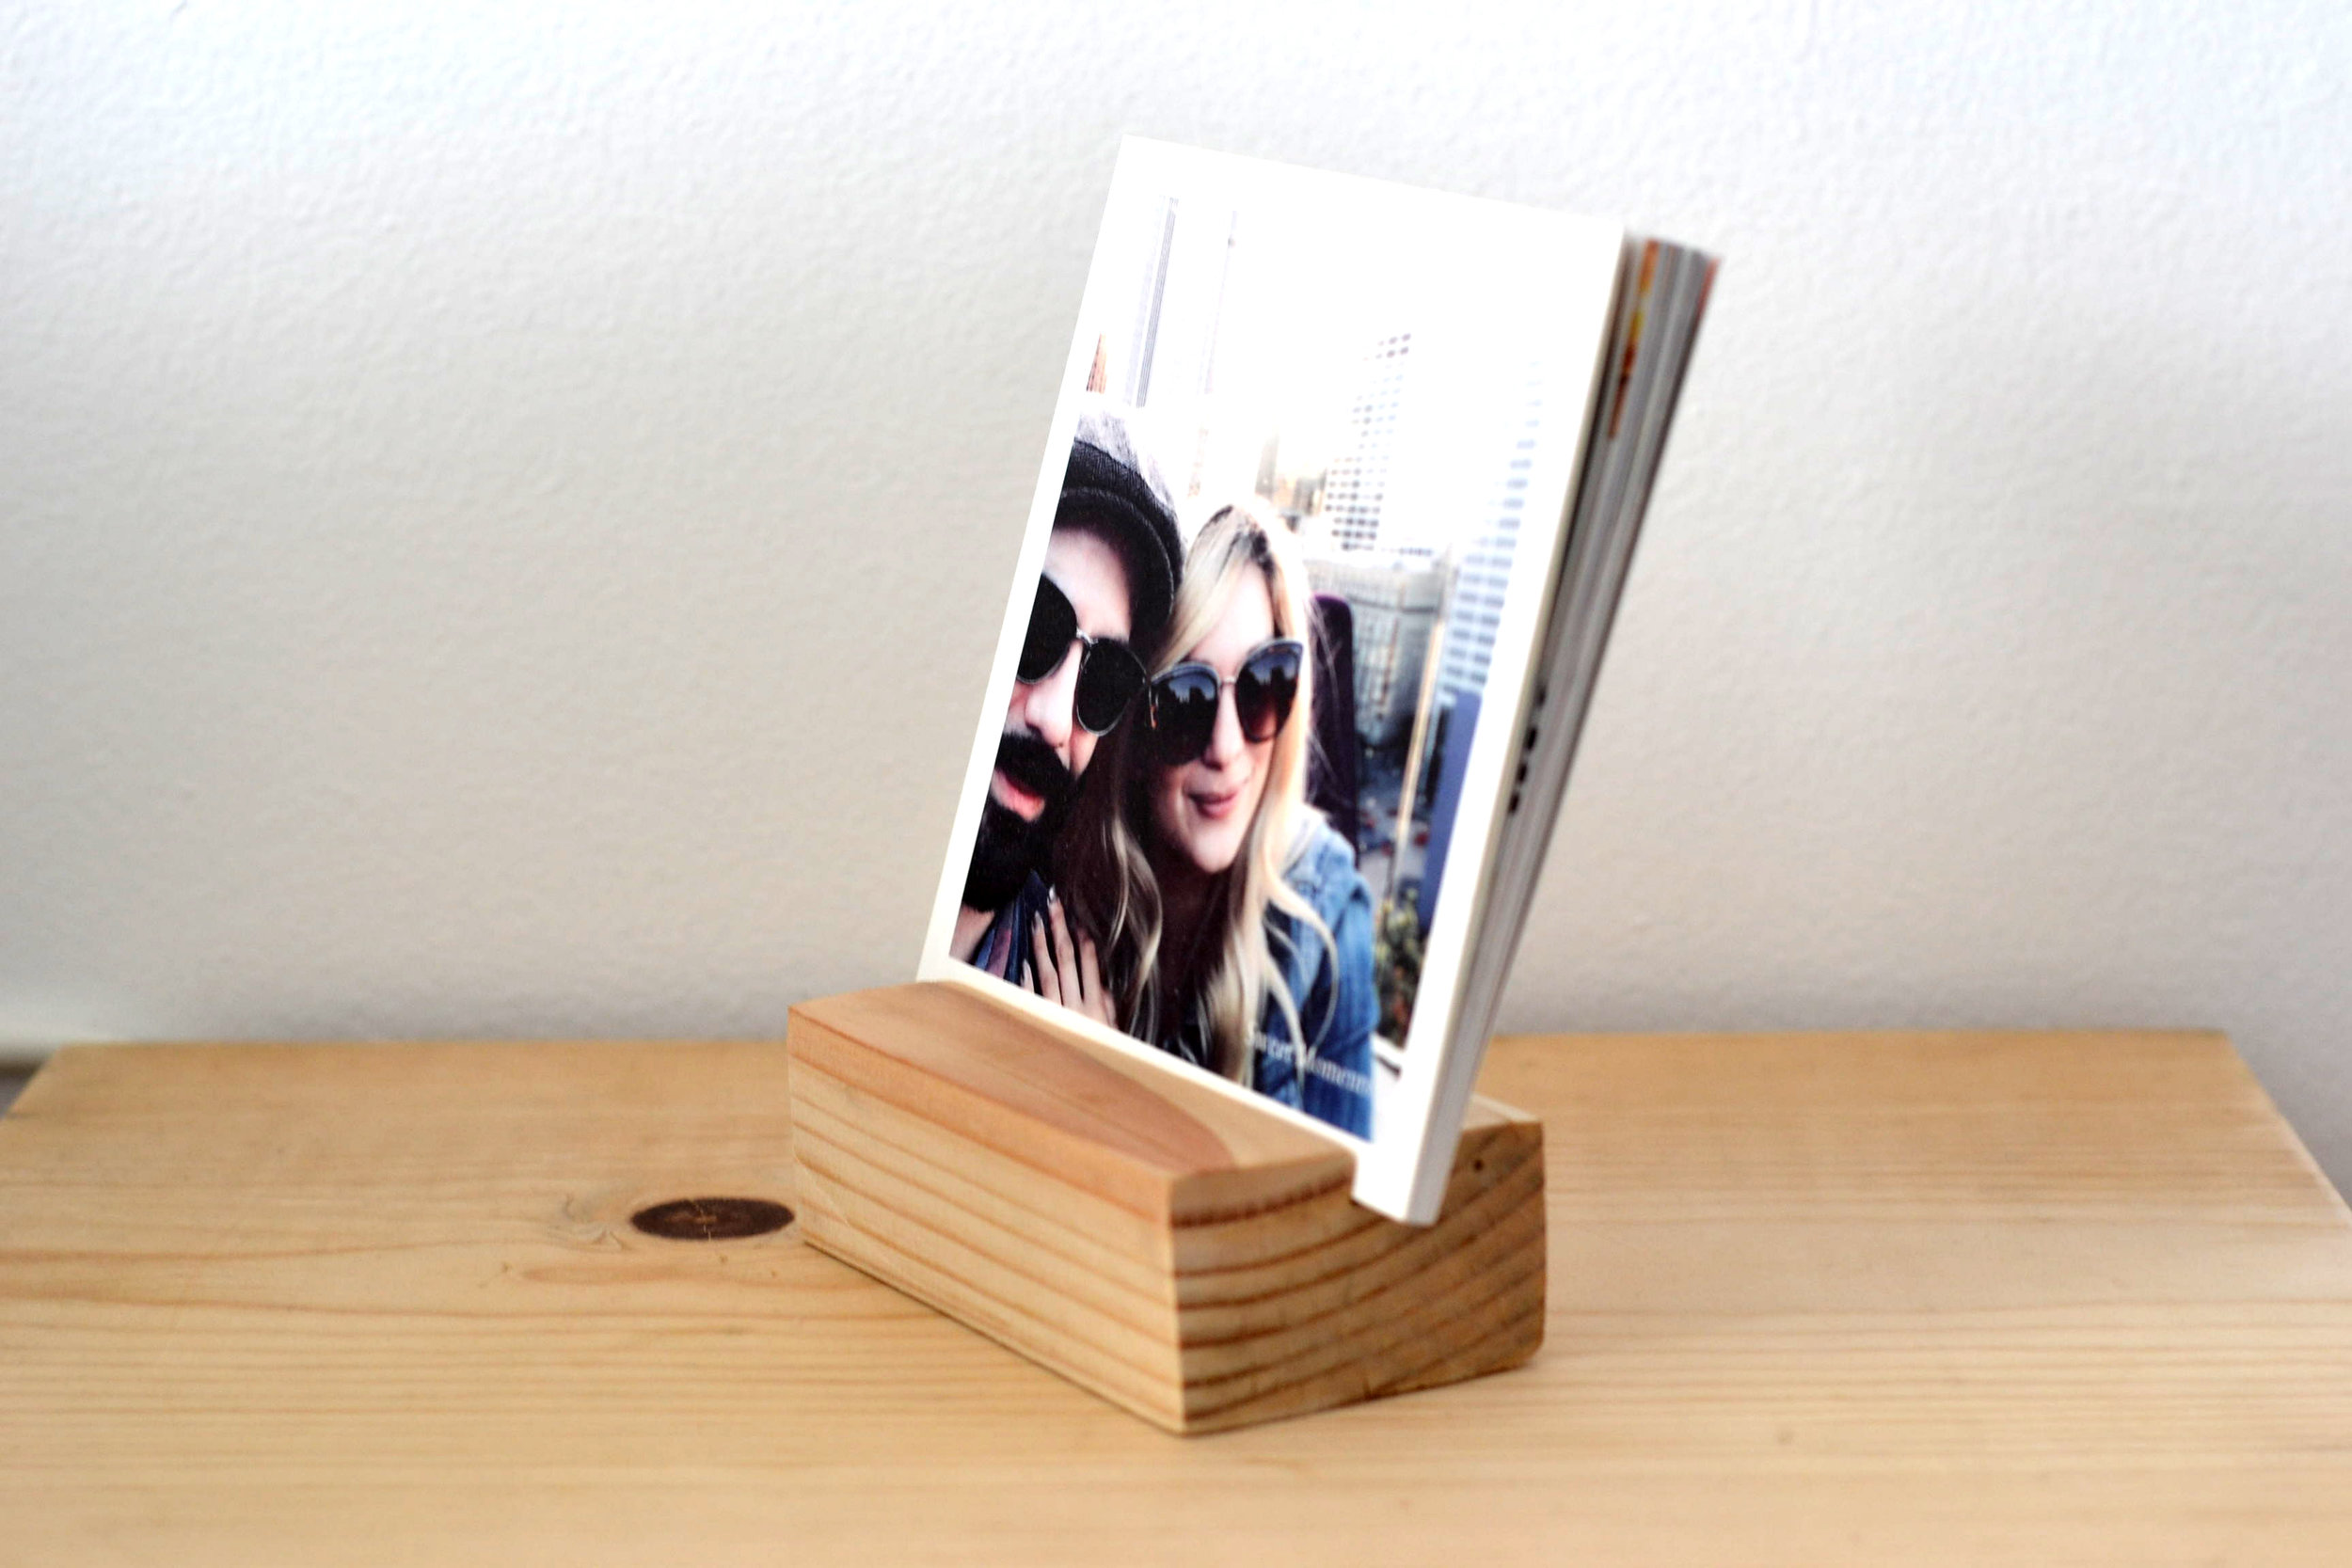
I love all the products from Artifact Uprising. I’ve made several photobooks for my close friends and they are always a hit. I especially love this wood block they sell along with photo prints. Since I prefer the photobook rather than prints, I decided to make my own wood block photo stand for my photobook.
I love the simplistic design and it goes perfectly with my modern aesthetic. It was so easy to make, but my way does require a circular saw which can be very intimidating. So if you are comfortable with power tools, give it a shot. You can always try to attempt to use a hand saw, it will just take a little more time and patience.
What you’ll need:
2"x 6" wood board
Circular Saw
Sand paper
Triangle and pencil
You can use any size wood you desire. I had a 2”x 6” board so I decided to make two. I love how they look on my night stands.

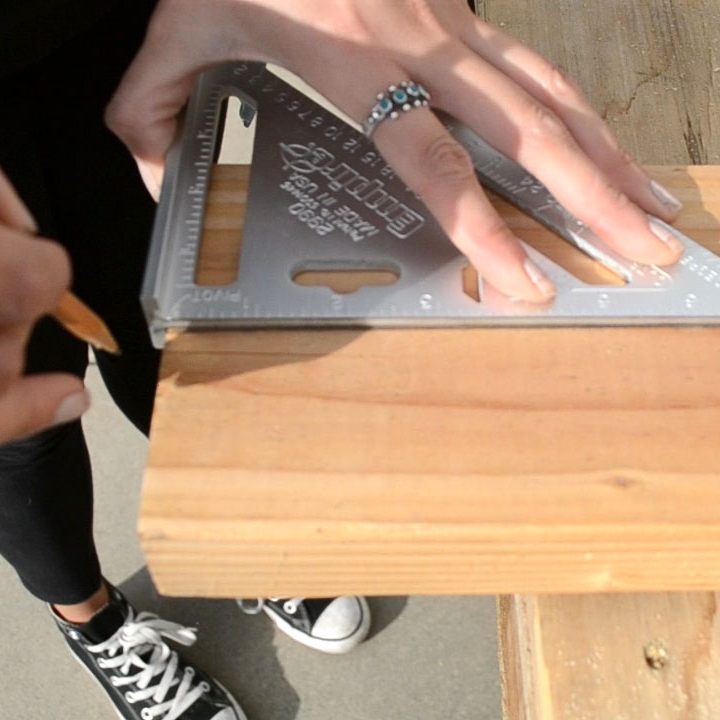
Step 1: Clamp down wood.
Step 2: Mark wood directly in the middle. (if you making two)


Step 3: Figure out how wide you want your block to be. I wanted my book to pop out about ½” from each side. Then mark that line.


Step 4: Mark a few lines of the thickness of your book or whatever you want your block to hold.


Step 5: Adjust your blade to only cut into your wood about ¼”.
Step 6: Rotate your blade to about 10 degrees.
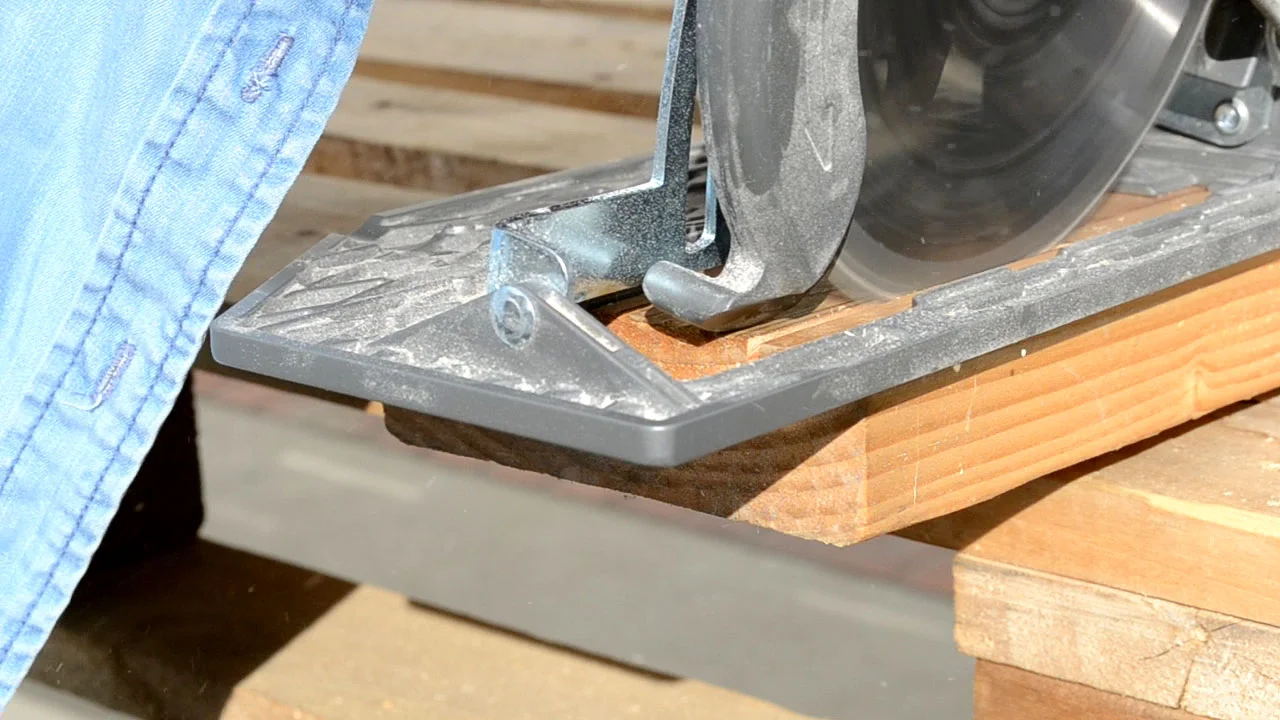

Step 7: Cut along one line


Step 8: Repeat until you have your thickness.


Step 9: Repeat on the other side if you are making two.
Step 10: Rotate angle back to 0 degrees.


Step 11: Adjust blade to cut a little past you piece of wood.
Step 12: Cut along the centerline of wood.


Step 13: Cut the last line drawn.
Step 14: Sand down until smooth.

Check out my video.